Tips & Modifications for the Sleeves & Body

You can breathe a sigh of relief once you've made it to the Sleeves & Body. The hard part of your sweater is over. The rest of your project should be a breeze, but that doesn't mean there aren't a few things to do while we're here. In this article we're offering a few tips to simplify the Sleeves and Body – like how to avoid getting stranded on Sleeve Island! We're also including some last-minute modifications that will ensure you love every inch of your sweater, just in the nick of time. 

All The Things...

1

Tips

  • Once you put your sleeve stitches on hold, try the top part of your sweater on for a test run! Hopefully everything looks amazing, if not, better to go back and update now rather than later.
  • If you like a longer body but are worried about running out of yarn, we recommend knitting the sleeves first. That way, when you're finishing the body you can keep going until you use up all of your yarn.
  • When using Backwards Loop Cast On for the underarms, the join between cast-on and existing stitches is always loose. To remedy this, cast on 2 fewer stitches than called for, then in the next row/round work a M1R at each end to take up slack
  • Do you love the Magic Loop, but feel like it's a bit fussy with sleeves? You're not alone. Julie has a few tips to make things a little easier: How to Use Magic Loop for Sleeves.
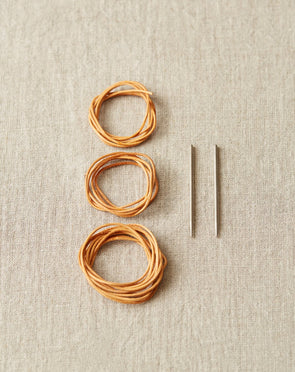
  • Try using our Leather Cord and Needle Stitch Holder Kit to hold your stitches. We find that the leather holds the stitches better than spare yarn, plus the interior-threaded needles allow you to knit on and off of the cord directly.
  • If you have Instagram, watch our highlight "SLEEVES & BODY" for a few more tips from Julie.
     
2

Modifications

  • Now's your moment to add Bust Darts if you'd like. If you didn't make a decision about them during the beginning of your project, it's not too late to decide! How & Why to Work Bust Darts
  • Don't feel like you have to throw out your project if the neckline is too open or messy - you have options! Julie's favorite way to fix this is by adding a little ribbing. Finishing a V-neck with Ribbing.
  • If your pattern has stockinette edges and you're not a fan of how they roll, you may choose to add some edging to your item. If it's a pullover, perhaps you add a few lines of rib or garter to the sleeves, neckline, and bottom of the body. If it's a cardigan you could add a Button Band or Collar. How to Pick Up Stitches for a Button Band or Collar. (PS - we always recommend referring to a test swatch to determine how much your project will roll at the edges - this varies based on your yarn choice and gauge.)
3

Next Steps

Once finished with the information above, you can continue moving forward with content guiding you through a Cocoknits Method sweater with our EVERLASTING KAL PAGE. If you're signed up for our emails, you'll receive a new email in two weeks all about Finishing & Blocking

If you don't know about it, our Everlasting KAL is our knit-a-long that's going on well...forever! You can join by yourself, with friends, or with an LYS. Best part? You get to pick what sweater to knit. Learn more by visiting the EVERLASTING KAL PAGE

Leave a Comment

Your email address will not be published. Required fields are marked *

Please note, comments must be approved before they are published