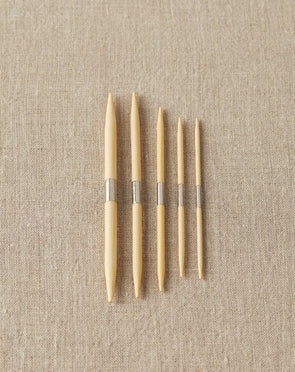
Use a skinny circular needle (I prefer a size US 0 / 2 mm 40'' [100 cm] circular needle) to pick up stitches along the front for button band/collar. First pick up the stitches as described. Then count your stitches and figure out if you need to add or subtract stitches to get to the stitch count given in the pattern. Now join yarn and knit one row on right side off of your skinny needle and onto your called-for needle size. As you knit, pick up or knit together stitches to reach the correct stitch count. Begin any pattern stitch on the next/wrong side row.
How to Pick Up Stitches for a Button Band or Collar
For Button Band/Collar

Set-up and Step 1
Find the very edge stitch—it will be a V but will most likely want to curl in so make sure you identify it.


Step 2
Slide your needle into the inside arm of this V—not the outermost arm, but the one on the inside edge of the V. Pick up 3 in a row, skip the 4th. Slip the needle in the way it wants to go— whether your V is right-side up or upside down, your needle will move from the outside of the V, behind the arm toward the inside of the V.


Step 3
Continue picking up 3 “arms,” skip the 4th all the way up. This is the ratio of rows to stitches so skipping every fourth row should yield the correct number of stitches for a button band.


Step 4
Note that when you are ready to knit, these new stitches may be sitting on the needle correctly or they might be sitting backwards on your needle (depending on the direction of the Vs). If they are sitting backwards on your needle, simply knit each one through the back loop. As you knit that first set-up row, you may choose to pick up those 4th / skipped arms and knit them together with the stitch before or after. Usually this is not necessary but if you are worried about holes, this should prevent them.

Try the Technique with These 3 Patterns

Emma (Version C)
The Emma cardigan is a quick-to-knit introduction to the Cocoknits Method and a great sweater to bundle up on cold days. The long line of rib running down the sleeves works to slim the sleeve silhouette, and the fabric-lined pockets prevent bulk in the hip area. Experiment with color and the perfect length for both the sleeves and the body.


Madeleine
Classic, French-inspired stripes lend this cardigan a sporty feel. The gentle A-line shape and slender sleeves make for a snug fit with just the right amount of ease.


Antonia/Antonio
Antonia is really a blank slate; a jumping off point to show you how to work English Tailoring from the top down. Once you work the shoulder area you can do anything with your Antonia...add waist shaping, pockets, a stitch pattern, a completely different collar. You will see how working English Tailoring from the top-down eliminates all seams.


Comments
Hi Sue, Thank you for contacting us with your question. We’d love to help. Would you please email us at knit@cocoknits.com and let us know which Cocoknits pattern you are knitting, what yarn you are working it in, and the specific nature of your problem—is it finding the place to pick up, or how it looks after the pickup? Looking forward to hearing from you :)
Finding it really hard picking up stitches along shoulder, and neck band with button holes. Hope this makes sense.
Picking up along shoulder and going down to pick up neckline
Hi Leni, It is really up to the individual knitter, depending on preference. Julie uses a size or 2 smaller needle because she is a loose purler. Traditionally ribbing was knit on 2 size smaller needles to increase its pulling in. Choose your needle based on how you want your ribbing to behave (and try it on a swatch :) ).
Hi there,
Generally would you use a smaller (than the body) needle size for the button band and ribbing on the bottom edge or the same size needles as the body?
Thank you
I’m trying to add a button band. The directions state to pick up 3 sets for every 4 rows. The problem is, I slipped the first stitch of every row. So I’ve only got one stitch showing for every 2 rows worked. What do I do?
Hi Helen,
We’re so glad you found it helpful!
Thank you. Great information. I always dread picking up stitches and usually have to do it several times to get the right number and not have gaping holes.
Leave a Comment