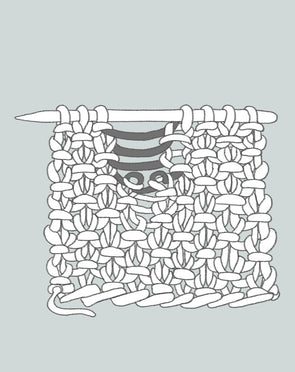
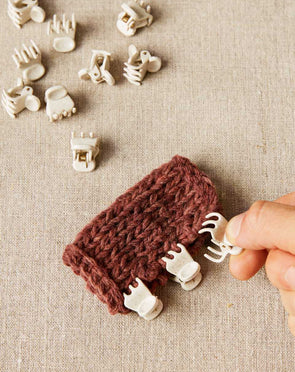
Learn how to work an integrated (and nearly seamless) Collar in Cocoknits Method patterns. This technique is used in Lizzie, Franca, Kiki, Eva, Sarah, Toni, Quinn, and Ruth. The Collar is started at the back of the neck before picking up stitches for the Shoulders. Instructions will be provided in the pattern, but it can be difficult to visualize so Julie will walk you through it in this video. There are also step-by-step instructions below. In both, you'll learn how the Collar is started and incorporated into the rest of the garment. Once you get the hang of it, we promise, you'll want this stunning textural detail on every cardigan you knit.


Comments
Hi Caryn, The first sentence of this tuturial: “How to Provisional Cast-On with Judy’s Magic CO” has a link to a more extensive video that shows the cast-on and then the transition into starting the collar. Starting around minute 4:00 Julie shows you how to identify the right side of the stitches. Hope that helps!
I am knitting the Toni sweater. I am at prep left collar. It would have been helpful if you had shown the video, knitting from the provisional cast on, not a separate collar using a normal cast on. I had never done a provisional cast on your way before and this is a first time knitting your way. In your pattern you directed us to use a provisional cast on. I would assume knitting from the provisional cast on that the knits would follow knits and the purls would follow purls (rib), mine does not. It looks like a series of purl bumps. Don’t know if this is wrong or the way it is, because there is no example to look at. I will bind it off and seam it and work collar like you did in video, but the reason for doing this sweater was to learn new things.
Hi Mary,
You will have 16 stitches after your shoulder pick-up. There is no stitch marker when you pick up the shoulder stitches until you add the yellow marker before continuing on to the collar stitches. The only stitch markers are the ones with the stitches on hold at the bottom of the piece you are working on. Have you watched these videos for Julie’s Toni here: https://www.youtube.com/playlist?list=PL3ydmLINSqkmthwA_3cPZFOSdb3eVPZxJ Videos 9-11 show the shoulder pick-up and joining of collar.
We’re sorry you’re disappointed and we’d be happy to answer your specific questions at knit@cocoknits.com. Good luck!
I am attempting to knit Toni sweater. I have the right half of collar completed. Trying to figure out a total stitch count after picking up ladders along shoulder. I pick up 16 stitches. But what happens to the 2 stitches which are to the right of stitch marker?
When you start to knit stitches for shoulder and neck do you have 16 or 18 stitches in that section?
The book does not even cover collars so no use. Have watched online videos and they help to a point but leave a lot unasnwered.
Thus far, this has been a frustrating and disappointing experience!
Hi Judith,
If you are a Ravelry user, there are a lot of pictures on the Franca KAL progress thread in our forum. Otherwise, we hope that this tutorial, along with the https://cocoknits.com/blogs/knit-tutorials/how-to-pick-up-stitches-for-the-cocoknits-method tutorial will give you what you need. Hope that helps!
It would be helpful to see the first few rows of working the PCO left collar joining with the ladder stitches on the left back.
Leave a Comment