In our previous dropped stitch tutorials you mastered picking up dropped stitches in stockinette and garter both before and after binding off. Now you might not be as scared of a rogue stitch as you used to be...but what about 2, 3, or even 4 stitches at once? While multiple dropped stitches may look intimidating, they don’t have to be scary. In this tutorial, Julie will teach you how to do just that.
How to Fix Dropped Stitches Part IV: Multiple Dropped Stitches in Pattern Stitch
Steps to Picking Up Multiple Dropped Stitches

1
Catch Dropped Stitches
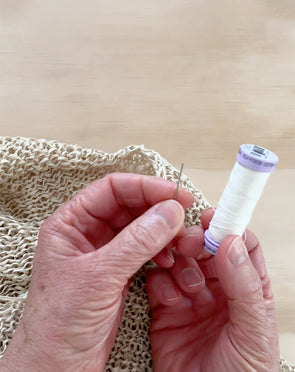
"Catch" the dropped stitches so you can work on them one at a time. The goal here is to organize the mess and make sure that the other stitches don't drop any further as you work on each stitch individually. You can use a variety of tools to hold the stitches such as Cable Needles or Opening Stitch Markers. Julie's favorite way to catch them is with the Split Ring Markers. These stitch markers have a pointed leg in the middle that nestles into your stitch for a secure hold. At the same time, because of their open loop shape, they're super quick to slide on and off.

2
Pick up One Dropped Stitch
Now you'll repair each stitch as you would with any single dropped stitch. The first thing you want to do is find the loop of the dropped stitch on one of the sides and pick it up from the front towards the back. We know that having multiple dropped stitches can look scary and overwhelming. Just try to ignore the other stitches for now and take it one at a time.

3
Determine if it's a Knit or Purl Stitch
If you're working stockinette stitch, you can skip this step and work step 4 until you get to the last loop, then skip to step 7. You can watch the video of Julie fixing stockinette stitch here: How to Fix Dropped Stitches Part I: Stockinette Stitch.
If you're working garter or a patterned stitch, hold your Stitch Fixer horizontally to determine if your stitch is a flat "v" knit stitch or has a purl bump right under your tool. You'll pick up the next ladder based on what stitch you want in the next row.
In the video Julie is working seed stitch, which means every purl is knitted and every knit is purled. Another easy way to think of it is that you'll be alternating knits and purls as you pick up the ladders. In the video you can see that the first stitch picked up is a purl. That means the first ladder will be picked up as a knit stitch. It's almost exactly the same for garter stitch, if you'd like to see how this looks with garter, you can watch this video: "How to Fix Dropped Stitches Part III: Garter Stitch (and Patterned Stitches).

4
Picking up Ladders for a Knit Stitch
Making sure you have the very next ladder, use your hook to pick it up: scoop up from behind and pull it forward through the loop. It may be helpful to repeat this out loud "scoop up from behind and pull it forward through the loop."

5
Picking up Ladders for a Purl Stitch
This is when having a STITCH FIXER is a huge help. Tuck your whole hook behind the ladder. Pull the Stitch Fixer all the way up so the hook on the other end is ready to use and the ladder is in front of the stitch on the hook. Finally, bring the hook back to the front of the ladder from above, rotate it, and pull the ladder up through the stitch, front to back. We know, this may be tough to visualize - that's why we made a video! You can watch Julie do this at 3:11.

6
Continue in Pattern
Continue working the dropped stitch up in pattern, using whichever end of the Stitch Fixer you need, until you get to your last loop.

7
Place Last Stitch on Needle
Once you get to your last loop, you'll want to twist it a little to the left when putting it back on the needle. To do this place your left needle through the front of the loop. Take your hook out and ta-da! You've fixed your first dropped stitch. Now it's time to move on to the next.

8
Continue Working Remaining Stitches
Free your next dropped stitch from its holder and repeat steps 2-7 until all of your stitches are picked up. Before you know it, all of your stitches will be back on the needle and looking great. Multiple dropped stitches really aren't as bad as they look. The key is to not freak out and just focus on one at a time - you got this!

Comments
This was the best! For picking up purls n knits. Right now we have a few dropped but carrying thread of loops so I’m trying to get them back onthe needle as stitches.😔🫣please don’t know how to begin but determined. 🤞that I finally get it all back on. Been 2dys now. Btw your answers on how to fix a dropped stitches are phenomenal. Ty
Great to hear!
Thank you! I have a huge mess here and I feel like I can absolutely repair it thanks to your tutorial!
We’re so glad! Thanks for letting us know. :)
Fantastic,thank you
So happy to receive these tutorials. Needed this one last year! Such a wonderful addition on to the book
Leave a Comment