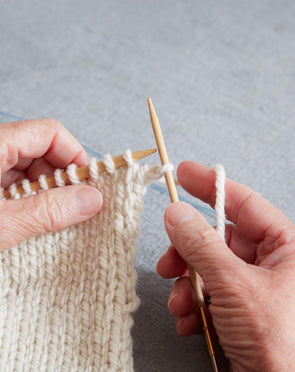
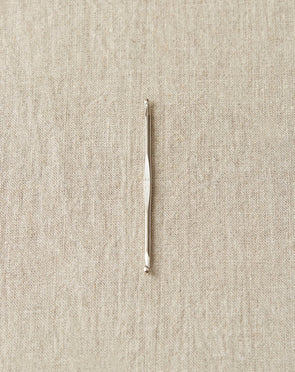
In this video Julie will teach you how to identify whether a dropped stitch is a knit or a purl and how to fix it accordingly. She will demonstrate on garter stitch but you will be able to apply this technique to other patterned stitches (directions for seed stitch will be almost the same as garter). Our Stitch Fixer tool is particularly helpful when alternating knit and purl stitches - you'll see this in action at step 5.
How to Fix Dropped Stitches Part III: Garter Stitch (and Patterned Stitches)
Steps to Picking Up Garter (and Patterned Stitches)

Pick up Dropped Stitch
Just like any other dropped stitch, the first thing you want to do is find the last loop available and pick it up from the front towards the back.


Organize Ladders
Take a moment to look at the horizontal bars of yarn running above the dropped stitch, we call these "ladders." You want to make sure that you pick up each ladder in order, not missing one. Look at the edge of the opening to help see which ladder is next. This is critical to keeping things tidy and in pattern. Don't let all the ladders freak you out. Just focus on one at a time.
Sometimes the ladders at the top are quite stretched out. With patterned stitches it can be particularly difficult to see which ladder is next to pick up because one will pop to the front and another will sit behind the work. It can be easy to pick up out of order, so double check that you are picking up the next ladder in line. If you get them out of order, just drop down and try again. If you're not sure, you can check the back.


Determine if it's a Knit or Purl Stitch
Hold your Stitch Fixer horizontally to determine if your stitch has a flat "v" knit stitch or a purl bump. You'll pick up the next ladder based on what stitch you want in the next row. With garter stitch, the rows alternate knit and purl, but every stitch in the row is the same. For seed stitch, you'll be alternating knit and purl stitch across the row, so you'll need to determine what stitch you need next: a knit or purl. In the video you'll see that Julie's first stitch is identified as a purl. Her next stitch needs to be a knit stitch because she's working garter.
In garter stitch (but not seed stitch) you can also look at the ladder above as an indicator. Ladders that need a knit stitch will sit behind the work, while ladders that need a purl stitch will pop out more.


Picking up Ladders for a Knit Stitch
Use your hook to pick up the ladder stitch: scoop up from behind, bring it forward through the loop. It may be helpful to repeat this out loud "scoop up from behind, bring it forward through the loop."


Picking up Ladders for a Purl Stitch
This is when having a Stitch Fixer is a huge help. Tuck your whole hook behind the ladder. Pull the Stitch Fixer all the way up so the hook on the other end is ready to use. Move the hook behind the ladder, so that the ladder is in front of the stitch on the hook. Finally, bring the hook back to the front of the ladder from above, rotate it, and pull the ladder up through the stitch, front to back. We know, this may be tough to visualize - that's why we made a video! You can watch Julie do this at 3:35.


Continue in Pattern
Continue working the dropped stitch up in pattern until you get to your last loop.


Place Last Stitch on Needle
Once you get to your last loop, you'll want to twist it a little to the left when putting it back on the needle. To do this place your left needle through the front of the loop. Take your hook out and you're ready to resume your knitting.


Comments
Thank you thank you. I just frogged 5 rows. Wish I watched yesterday. You really make it so easy to understand! Love ❤️ the video as well as printout 💕. Love all your tutorials
Excellent tutorial. Made it easily understood with the demo and the visual.
Thank you very much Julie, for the wonderful, helpful tutorials. I save them for when I need to know how to do something. Videos like these can be a lifesaver.
Leave a Comment