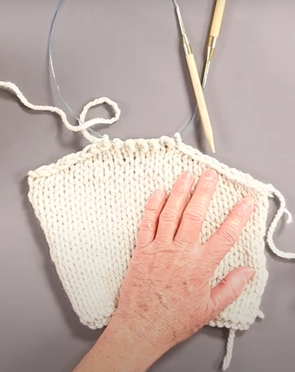
How to Fix Dropped Stitches Part II: Stockinette Stitch after Binding Off
Steps to Fix Dropped Stitch After Binding Off
The first three steps (included below) are the same instructions as our "How to Fix Dropped Stitches Part I: Stockinette Stitch" tutorial. You will repeat Step 3 until your stitches get too tight.

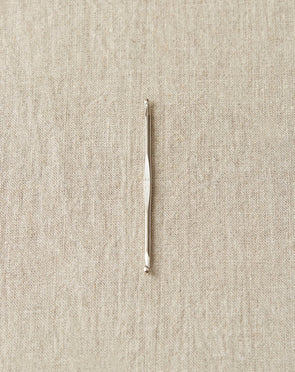
Don't Panic! Grab the Stitch Fixer.
First step: don't panic! Take a deep breath and grab a STITCH FIXER tool (in a pinch, a crochet hook works too). The steel hooks on this tool make it easy to pick up rogue stitches. The two-hooked design will come in handy when picking up purls or patterned stitches (we will release a video about that in May 2021).


Pick up Dropped Stitch
Use your hook to pick up the dropped stitch from the front toward the back by scooping up from underneath. If the stitch is a little lost you may need to tug it out a bit with your fingers - Julie demonstrates how to do this in the video. You can also let it drop and grab the next stitch down.


Pick up Ladders
Take a moment to look at the horizontal bars of yarn running above the dropped stitch, we call these "ladders." You want to make sure that you pick up each ladder in order, not missing one. This is critical to keeping things tidy and in pattern. Don't let all the ladders freak you out. Just focus on one at a time.
Use your hook to pick up the ladder stitch from behind: scoop up from behind, bring it forward through the loop. Continue picking up ladders in order, maybe repeating this out loud if it's helpful "scoop up from behind, bring it forward through the loop." Continue doing this until the stitches become too tight, then you're ready to move on to step 4.
Sometimes the ladders at the top are quite stretched out. It can be easy to pick up out of order, so double check that you are picking up the next ladder in line. If you get them out of order, just drop down and try again. If you're not sure, you can check the back.


Hook Final Loop Through to Back
This is where our STITCH FIXER tool really comes in handy. Take the final loop and pull through to the back. When using the Stitch Fixer you can just slide the stitch down the length of the tool and let the second hook on the other end take the stitch through. Now your stitch will still be on the Stitch Fixer, but on the WS of your work. It should be pretty invisible on the front, but there will be a spot where a stitch is "decreased."


Hook Spare Yarn Through Loop
Grab a spare piece of yarn. It doesn't take a lot, just a few inches. Use the hook to pull the yarn through the held loop.


Pull Spare Yarn to One Strand
Pull one end of the yarn all the way through so you have one strand going through the loop.


Work in Ends
Now your loop is safe and secure so you can work the ends in as if you had started a new ball of yarn in that spot. You can snip any excess spare yarn so it's a nice workable length. Julie uses our Yarn Snips in the video - don't they have the most pleasing "snip, snip" sound? She also uses one of our Tapestry Needles. They have a bent-tip, which we consider a ‘must have’ as it makes sliding under and through stitches much smoother.
When working in ends on the WS, Julie likes to use Swiss Darning, also known as Duplicate Stitch. Get a full tutorial with step-by-step instructions here: "How to Work in Ends with Duplicate Stitch." You'll only need to follow this technique for a couple stitches in each direction.


Finishing
If the stitches you looped up seem to be a different gauge, just gently tug on the area length and widthwise and they should smooth out. If it still doesn't look great yet - no worries! It will even out more when you WET BLOCK your project. There will be a disappearing stitch where the mend was made, so it will not be 100% perfect, but unless someone's looking really closely, it won't be noticed. And as Julie says "If someone sees that, they're standing too close!"


Comments
Hi Julie, that’s great to hear! Thanks for taking the time to let us know :)
I knew there was a way without ripping out . I feel like a genius now that you taught me how 😊
We’re so glad! Thanks for sharing your experience with us. :)
Love your tutorials. Cannot thank you enough. I have been able to complete projects thanks to you. They are clear and answer all questions
Hi Sandra,
No offense taken. We are not claiming that we invented the concept of a stitch fixer tool. That’s great that you found a tool that works for you! We hope our dropped stitch tutorials help you make more use of it.
The Cocoknits Stitch Fixer is different from the Susan Bates tool because ours has a hook on both ends. Our design is also different from other double hook tools because it is metal and can cling to magnets like our Maker’s Keep. We also only make the tool, at the moment, in size US D/ 3mm because we find that is the most versatile size for repairing a wide range of stitch sizes. If you’d like to see the tool in person, it is available at local yarn shops. Enjoy!
Awesome! Good to know about keeping the darned yarn a bit loose when threading loose ends. Thanks!
No offense intended, but I think the credit for the s.f. design should go to Susan bates. Hers have been available for years. I use mine often and would be lost without them!
They are available online — 12.00 for a pack of 5.
Thank you thank you
Going into my knitting bible
Thank you 🙏. I have two projects I’ve done this too and I can now fix before I wear.
Thank you 🙏
Leave a Comment