How to Kitchener Stitch
Instructions

Set-up
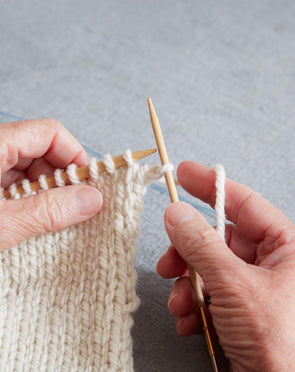
Place stitches on 2 parallel needles with wrong sides toward each other, right side facing out. Thread a length of working yarn three times the length of the pieces you are joining onto a tapestry needle. Hold work so you have a front knitting needle and back knitting needle.
Insert tapestry needle through first stitch on front needle as if to purl, pull yarn through leaving stitch on needle. Next insert tapestry needle through first stitch of back needle as if to knit, pull yarn through leaving stitch on needle.


Step 1
Keeping yarn under the needles at all times, insert needle through first stitch on front needle as if to knit and take it off the needle. Then insert needle through second stitch on front needle as if to purl and leave it on the needle; pull yarn through.


Step 2
Keeping yarn under the needles, insert needle through first stitch on back needle as if to purl and take it off the needle. Then insert needle through second stitch on back needle as if to knit and leave it on the needle; pull yarn through.


Step 3
Chant this to yourself as you work: Knit off, purl on (front needle). Purl off, knit on (back needle). Remember to keep the yarn below the needles and match the tension to your knitting tension. If you prefer, you may work 4 or 5 stitches off of both needles (always ending with Step 2), then go back and adjust the tension before continuing, or adjust the tension at the end if you have 2 small edges.


Comments
Hi Judy, when there is 1 stitch left on each needle, you will “knit off” the front one, then “purl off” the back one, then adjust the tension and weave in your end. Hope that helps.
Did not see any instruction for how to finish the last 2 stitches
So glad to hear it was helpful!
This is the first tutorial I’ve found that actually notes to keep the yarn under your needles. Clear and understandable instructions. Thank you!
You are welcome! We’re so glad you find our tutorials helpful.
Love, love, love these instructions! So easy to follow and the “mantra” really helped. My first ever Kitchener stitching – using lace weight silk mohair – turned out perfectly.
I can always depend on Cocoknits to make my knitting easier and more enjoyable. Thank you!!
Love it. The best Kitchener explanation ever. Thank you so much
Leave a Comment