How to Customize a Neckline: Decorative Details

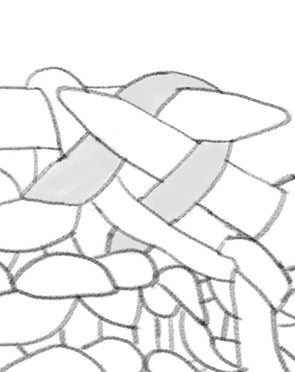
These decorative details add a subtle artistic flair to your knit sweaters. Shown here on a (miniature) rounded neckline, they can also be added to cuffs and hems. 

For full video tutorials, check out our FREE On Demand Class.

Patterns seen above are our Molly sweater and Milli Kerchief.

A Few Ideas...

1

Welt

Adds a puffy stockinette ridge (aka "welt") to the base of your neckline

  1. Pick up your neckline stitches and knit one plain round.
  2. Kf&b into every stitch to end of round.
  3. * K1, slip 1 purlwise with yarn in front. Repeat from * until 2 stitch remain, k1 (1 stitch remaining).
    • For a three-row welt, work round 3 across two rounds, leaving the final stitch at the end of the second round.
  4. Working the remaining stitch of the previous round with the first stitch of the next round, k2tog. K2tog to end of round (you should be back to your original neckline stitch count).
  5. Continue neckline as instructed.
A

A Two Color Welt adds a playful pop of color to the inside of a neckline.

  1. Pick up your neckline stitches and knit one plain round.
  2. K 1-2 more plain rounds.
  3. Using a separate needle, pick up stitches on the inside if your neckline 2-3 rows down (depending on how many plain rounds you worked), into the base of your neckline. You should have the same number of stitches on both needles.
  4. On the newly picked up inside stitches, with WS (wrong side) facing, use your contrast color and k 1 round.
  5. K 1-2 more plain rounds. It should be the same number of rounds you worked on the first needle.
  6. Turn your work so the RS (right side) is facing, and your first needle is in front of your second needle. Working one stitch from the front needle and one stitch from the second needle, k2tog to end of round. This will knit the outside and inside layers together, and you should be back to your original stitch count.
  7. Continue neckline as instructed.
2

Lateral Braid

Creates a horizontal chain at the base of your neckline.

  1. Pick up your neckline stitches and knit one plain round.
  2. *Skip the first stitch, insert your RH (right hand) needle into the second stitch from behind and ktbl, but do not remove the stitches from the LH (left hand) needle. Bring your RH needle around to the front and knit into the first stitch, then slip both stitches off LH needle. Slip one stitch from your RH needle back over to your LH needle. Repeat from * until to end of round, and do not slip final stitch onto LH needle.
  3. Grab a Stitch Fixer or crochet hook. Insert your hook through both legs of your first lateral braid stitch (which will look like a sideways V) from the top. Twist your hook counterclockwise. Insert your hook into the first st on your RH needle and slip it off. Pull the stitch through both legs of the lateral braid stitch. Place the stitch back onto your LH needle and knit it.
  4. Continue neckline as instructed.
3

Fold Over Rib

Creates a plump and squishy double-layer ribbed neckline.

  1. Pick up your neckline stitches and work 1x1 ribbing (or whatever ribbing your pattern calls for) until your neckline is 1 row shy of your desired height. Note how many rounds you worked.
  2. Optional turn row: * K1, sl1wyif, repeat from * to end of round
  3. Work the same amount of rounds as you worked in Step 1.
  4. Finishing options:
    • Bind off loosely and whipstitch the edge to the inside neckline edge
    • *K1, pick up 1 stitch at the base of the next stitch from the inside and k2tog with st on LH needle. Repeat from * until all st are bound off.
4

Rolled

A retro finish that creates a rolled "raw" edge look.

  1. Pick up neckline stitches and work in stockinette until your desired height. The collar will roll outward, so be sure to allow for rolling when checking for height.
  2. Bind off with Jeny's Stretch Bind-Off or a similarly stretchy/loose bind off.

Pattern shown is our Jane sweater.

5

Purl Row

Subtly offsets a ribbed neckline to give it more definition.

  1. When picking up stitches for the neckline, work a purl row for the first row
  2. Continue with the ribbed neckline as instructed

Pattern shown is our Mabel sweater.

Continue the Neckline Series

1

How to Customize a Neckline: Decorative Details (Free On Demand Class)

Full video tutorials for each neckline detail shown above.

FREE On Demand Class

2

How to Customize a Neckline: Rounded (Cocoknits Method)

Learn how to adjust the depth of your round neck Cocoknits Method sweaters.

Full Tutorial

3

Mabel Customizations

More sweater customization ideas, including adding a turtleneck.

Full article

Leave a Comment

Your email address will not be published. Required fields are marked *

Please note, comments must be approved before they are published