How to Knit an I-Cord Bind Off Without Holes

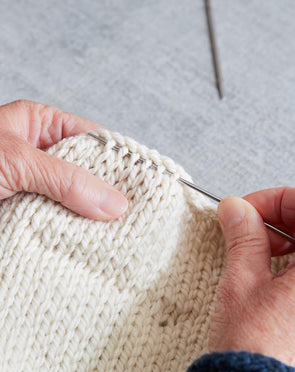
If you've ever worked an I-cord bind off and noticed small holes beneath your I-cord border, Julie has developed a simple trick to ensure a smooth and hole-free edge.

Julie demonstrates this technique on our Milli Kerchief, which has curved ties that are shaped using short rows. If you are using the Easier Option instructions, the short rows are turned without using the Shadow Wrap Short Row technique. This creates a small gap between every other stitch where the turn is worked. When a typical I-cord bind off is worked over these gaps, it can result in small holes.  This trick will fix that!

Note: The standard pattern option that uses Shadow Wrap Short Rows will not have these holes.

Instructions

X

Seen here are the holes created when working the Easy Option short rows and a typical I-cord bind off (K1, K2tog through the back loop, sl 2 sts back to left needle).

Seen here is an I-cord bind off without holes, using the Easy Option short rows and Julie's trick as follows:

1

Set-up: Identify Gaps

Note where the gaps occur between stitches. On Julie's Milli Kerchief the gaps are between every 2 stitches.

2

K1, K2tog through the back loop

Work the I-cord bind off as written, but pause before slipping the stitches back. (K1, K2tog through the back loop)

Note: Steps 3-6 are only worked when you encounter a gap between stitches.

3

Work modified KRL

Work a modified KRL by inserting your right hand (RH) needle into the right arm of the stitch below the next stitch on your left hand needle (LH), from behind.

4

Lift onto LH needle

Lift this stitch onto your LH needle. Do not knit it.

5

Sl 2 st back to LH needle

Slip the 2 stitches on your RH needle back onto your LH needle.

6

K1, K3tog through the back loop

K1, then K3tog (instead of k2tog) - this will decrease the new stitch you previously lifted onto the LH needle.

7

Sl 2 sts back to left needle

Slip the 2 stitches on your RH needle back onto your LH needle.

8

Continue

For stitches without a gap, work the I-cord bind off as normal: K1, K2tog through the back loop. Sl 2 sts back to left needle.

Repeat steps 3-6 when you encounter a gap.

9

Voilà!

While we demonstrated this trick on our Milli Kerchief, it can be used on any pattern that has similar holes.

The Pattern

1

Milli Kerchief

A simple triangle bandana with a special tailored detail: the ties are made using SHORT ROWS, which create a curved shape that wraps more comfortably around the neck as well as saving yarn yardage and knitting time. The pattern includes "Easier Option" instructions for a simplified cast on and short rows, as well as instructions for a striped version and a bobble version.

MILLI KERCHIEF PATTERN PAGE

Leave a Comment

Your email address will not be published. Required fields are marked *

Please note, comments must be approved before they are published