Attaching No-Sew Leather Handles to the Four Corner Bag

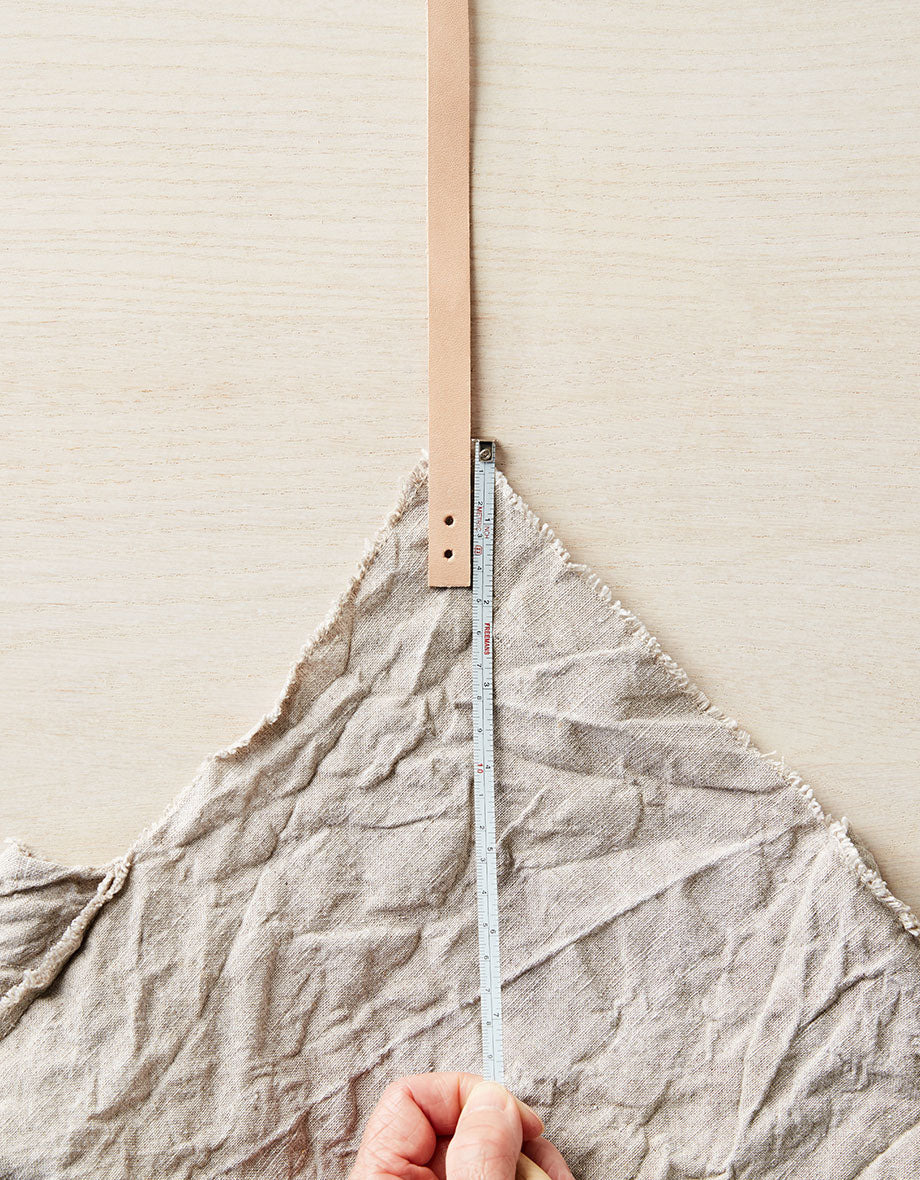
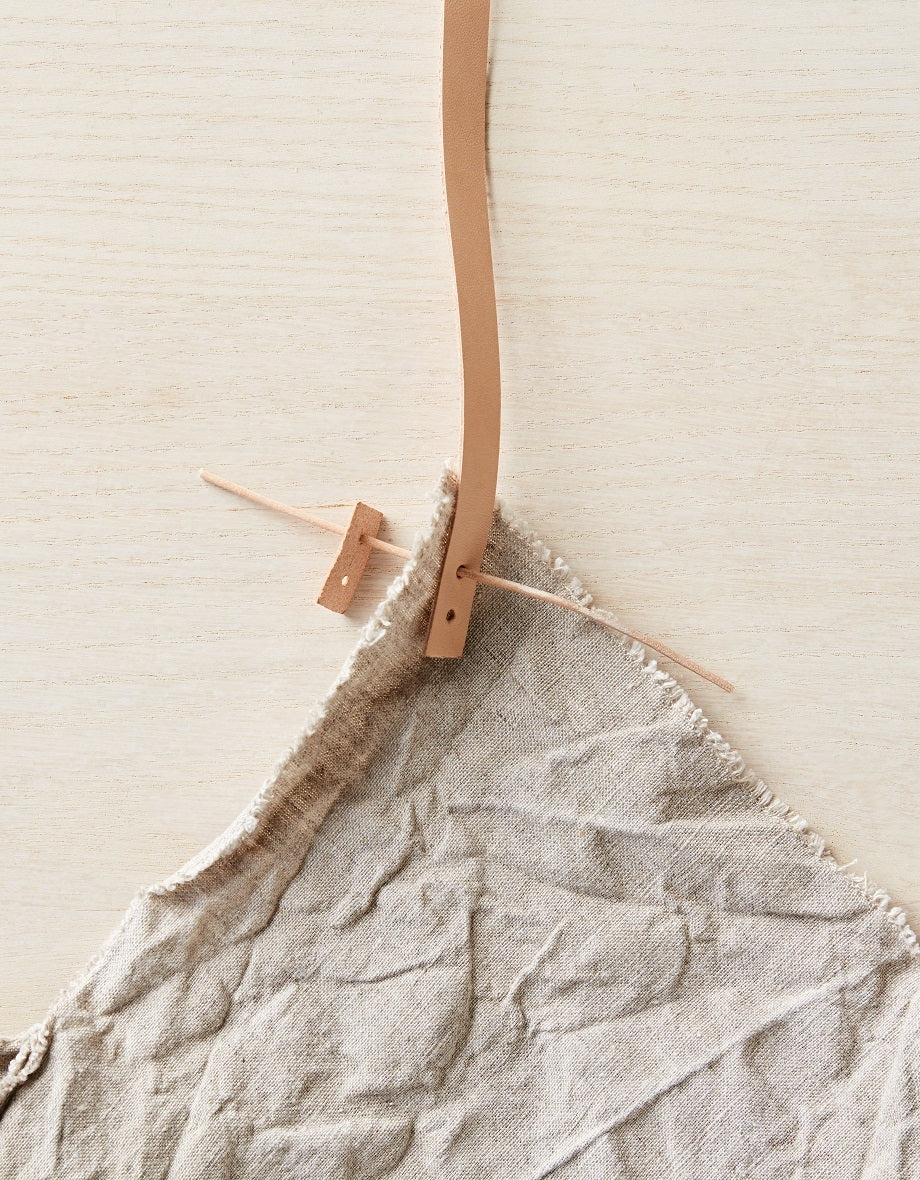
Attaching straps is no problem with our no-sew Leather Handle Kit! In this tutorial, we're teaching you how to attach these handles to the Four Corner Bag. Julie made a video walking you through the process above, or you can read the step-by-step directions below. The result: a versatile linen bag with beautiful raw edging and a minimalist look. We use this bag for our knitting projects, visits to the farmers market, and day trips. The leather handles can also be used for replacement straps on an old bag you love, or perhaps you've created a handmade bag of your own and want simple DIY handles. Like many of our tools, there are endless ways to use this kit.

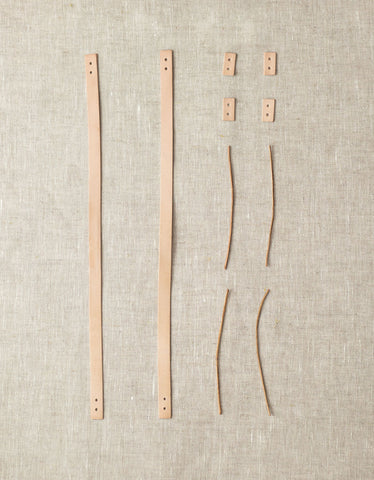
Our Leather Handle Kit now comes in two sizes: REGULAR and SHORT

How to Attach Handles to your Cocoknits Four Corner Bag:

1

Wash Your Bag

Your bag will be delivered inside-out, you'll know this because the Cocoknits' tag will be on the outside. Keep it this way to wash it. You'll notice that the fabric is a bit stiff, to soften and create that beautiful linen texture we recommend washing the bag on any setting in your washing machine. After drying (air drying recommended) its texture should transform to look like the picture in the step 2. 

2

Trim & Turn Right Side Out

Once washed and dried, there will be a beautiful texture, but also quite a bit of threads coming from the edges of the fabric. Trim excess threads with a Yarn Snip to create a fringe along each edge of bag. You will have fewer or no threads to trim with subsequent washings.

3

Align Handles

Lay leather handle on any corner on the outside of the linen bag so the top hole is approximately 1”/2.5 cm from top of point. If you're in need of a cute ruler for your craft measuring, check out our Pebble Tape Measures, we love them because of the way the organic shape fits perfectly in your hand. 

4

Thread 1st Hole

Use a blunt, pointed object such as a US 2/2.75 mm knitting needle, tapestry needle, or small cable needle. If you're not a knitter you could use something like a skewer or toothpick instead. Push needle through hole in leather, then holding fabric taut, wiggle it through the fabric, working the needle through the weave without ripping fabric.

5

Add Leather Washer

Continue with needle through one hole of leather washer, placing washer with right side facing out. Withdraw the needle, keeping holes aligned. Thread leather cord through the hole you have created, from the front of the handle, through the fabric and hole of washer.

6

Thread 2nd Hole

Now repeat the process, working from the second hole of leather washer, through fabric, and out the front of the leather handle. Adjust the cord so the ends are the same length.

7

Tie a Square Knot

Work a square knot with cord ends: left cord over right, tighten; right cord over left, tighten.

8

Repeat

Move to the next corner over and repeat the above steps for the other end of same leather handle. Repeat entire process for second leather handle.

Care

One of our favorite parts of the Four Corner Bag is how incredibly durable the linen is despite it's light appearance and weight. Julie likes to use hers for grocery shopping and food, so it gets dirty on occasion. No problem! Just take the handles off and throw it in the washer, then repeat these steps. 

DIY

We created a pattern for the Knitted Four Corner Bag, which includes three different stitch variations and two sizes. Or if you feel like adding some extra flare, check out our article "How to Customize Your Four-Corner Bag."

Comments

Cocoknits

Hola Ainhoa, las instrucciones para hacer la bolsa de tela se incluyen con las asas al comprarlas. Están en inglés pero tienen fotos. ¡Espero que ayude! [Hi Ainhoa, the instructions for making the fabric bag are included with the handles when you purchase them. They are in English but have pictures. Hope that helps!]


Ainhoa

Quiero el patrón de tela .por favor de la bolsa con las asas de cuero


Leave a Comment

Your email address will not be published. Required fields are marked *

Please note, comments must be approved before they are published