Intarsia Pt. 2: Working in Ends While Knitting

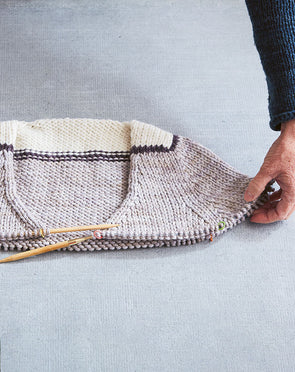
Intarsia is all fun and games until it’s time to weave in those pesky yarn tails. But don't break out that tapestry needle just yet - we have a simple wrapping technique to work in all your loose ends while you knit. You read that right: you don’t have to weave in all those tails at the end of your project. So say goodbye to your tapestry needle and hello to intarsia made easy.

If you haven’t yet, we recommend checking out Intarsia Pt. 1: How To & Managing Yarn.

Recommended Tools

1

Tape Measure

For measuring the amount of yarn needed for each Contrasting Color. See Intarsia Pt. 1 to learn how.

SHOP TAPE MEASURE

2

Yarn Snip

For trimming yarn tails.

SHOP YARN SNIP

3

Natural Mesh Bag

Optional: Organize all your different working yarns to prevent them from getting tangled.

SHOP NATURAL MESH BAG

Instructions

1

Continental Style

Also called "picking," this is when the working yarn is held in your left hand.

A

Knit with your Main Color (MC) up to where your Contrasting Color (CC) begins.

B

Drop MC. Pick up CC, being sure to leave at least 4-5 inches of tail.

C

Knit one stitch with CC.

D

With your right hand, pick up CC tail from underneath the dropped MC yarn (up and over the right side), so that the CC tail twists around the MC tail. This will secure it.

E

You will now have the CC working yarn in your left hand, and the CC tail in your right hand.

F

Insert the tip of your right needle into the next stitch as if to knit. Do not knit a stitch.

G

Wrap the CC tail around the right needle counterclockwise as if to knit. Do not knit a stitch.

H

Wrap the CC working yarn around the right needle as if to knit. Do not knit a stitch.

I

With your right hand, unwrap the CC tail by moving it under the right needle from right to left. It will come over the top of the MC working yarn behind the right needle.

J

Complete one knit stitch with your CC working yarn.

K

Knit one stitch normally.

L

Repeat these steps until your color section is over or your tail runs out, alternating with one normal stitch, one wrap stitch.

M

If desired, trim your remaining CC tail down to about an inch.

2

English Style

Also called "throwing," this is when the working yarn is held in your right hand.

A

Knit with your Main Color (MC) up to where your Contrasting Color (CC) begins.

B

Drop MC. Pick up CC, being sure to leave at least 4-5 inches of tail.

C

Knit one stitch with CC.

D

With your left hand, pick up CC tail from under the dropped MC yarn (up and over from the right side), so that the CC tail twists around the MC tail. This will secure it.

E

You will now have the CC working yarn in your right hand, and the CC tail in your left hand.

F

Insert the tip of your right needle into the next stitch as if to knit. Do not knit a stitch.

G

Wrap the CC tail around the right needle clockwise, the opposite direction you would to knit. Do not knit a stitch.

H

Wrap the CC working yarn around the right needle as if to knit. Do not knit a stitch.

I

With your left hand, unwrap the CC tail by moving it over the right needle from left to right.

J

Complete one knit stitch with your CC working yarn.

K

Knit one stitch normally.

L

Repeat these steps until your color section is over or your tail runs out, alternating one normal stitch with one wrapped stitch.

M

If desired, trim your remaining CC tail down to about an inch.

3

Working in Multiple Tails at Once / Traveling MC

Depending on your pattern, you may have multiple tails that need to be worked in along the same row. Or, you may want to "travel" the MC across the back of your CC so that you can use it on the other side without having to cut it.

A

Instead of knitting one plain stitch between wrapped stitches (per the instructions above), simply alternate between tails on every stitch. 

B

You can wrap multiple tails on the same stitch if you prefer, but this may appear more bulky on the back.

4

Voila!

All your tails are neatly worked in! Once you're finished, you can trim them down to your desired length.

Patterns that Use Intarsia

1

Nine Patch

Intarsia is used to create the colorful patches in the NINE PATCH cardigan. Nine Patch is really two patterns in one: you get to choose whether you knit it with sleeves or as a vest - instructions for both are included. This pattern uses a modified Cocoknits Method with English tailored shoulders, but the worksheet is not required.

2

Molly

Intarsia is used to create the contrasting elbow patches in Molly (Version B). The Molly pullover (included in the COCOKNITS SWEATER WORKSHOP) is a sophisticated take on a basic sweatshirt, with Cocoknits Method shoulder construction and a rounded neckline achieved through short-row shaping.

3

Toni

Intarsia is used to create the patch pockets on Version A of the TONI Cardigan. Toni is a Cocoknits Method V-neck cardigan with plenty of customization options: two types of incorporated button bands, two types of color blocking, two types of pockets, two different lengths, and optional short-row bust darts.

4

Ally

Intarsia is used to seamlessly create the color-blocked sleeves in Ally. The distinct lines of this Cocoknits Method pattern were inspired by moto jackets. It also features articulated elbows, which are worked with short-row shaping.

Leave a Comment

Your email address will not be published. Required fields are marked *

Please note, comments must be approved before they are published