Intarsia Pt. 1: How To & Managing Yarn
Intarsia creates separate islands of color in your project. Unlike Fair Isle, the different yarns are not carried over or stranded along the back as you work, which allows for larger areas of color without a mess of "floating" yarn behind them. Because the strands of yarn are picked up and dropped at each color change, the separate colors must be twisted around each other in a way that connects them while still appearing seamless on the front. We'll walk you through the simple how-to steps for intarsia on both the knit and purl sides, as well as Julie's favorite trick for dealing with multiple yarn colors at once.
Recommended Tools


3
Natural Mesh Bag
Optional: Organize all your different working yarns to prevent them from getting tangled.

4
Tapestry Needle
Optional: If you don't feel like working in ends as you go, you can weave in all your ends when finishing.
Instructions
1
How-to Knitwise
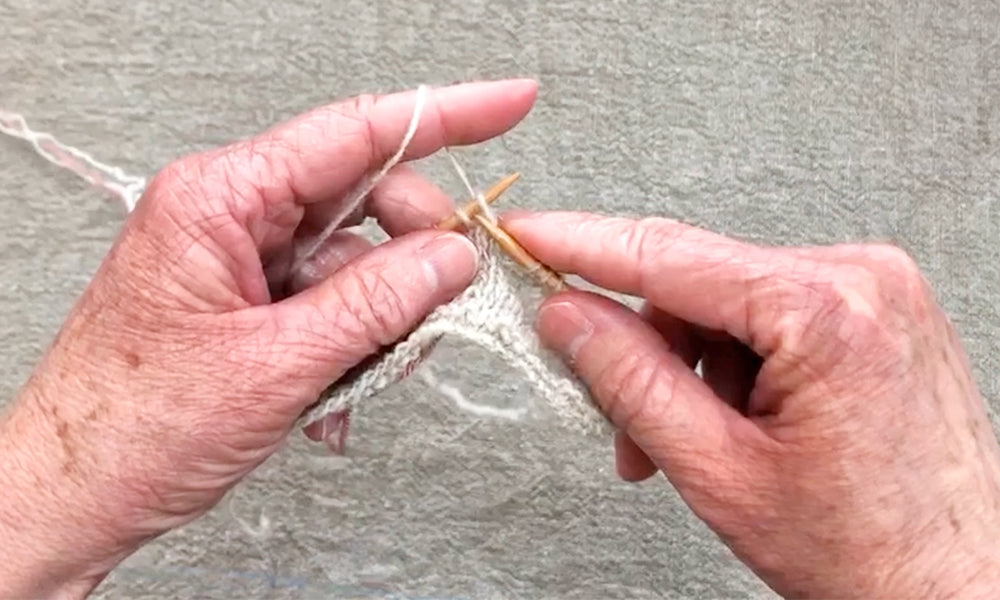
A
Knit with your Main Color (MC) up to where your Contrasting Color (CC) begins.

B
Drop MC on top of the CC, and pick up CC so that it comes up behind and back over MC. (Both strands will be on the back side of your work.)

C
The MC will be twisted around - or "locked in" - with the CC.

D
Knit with CC up to the next color change.

E
Drop CC on top of a new strand of MC and bring that strand up behind and over CC. Note: the yarns are not carried behind with intarsia, so there will be a new strand of yarn for each color change.

F
Knit with MC. Repeat these steps for each color change.
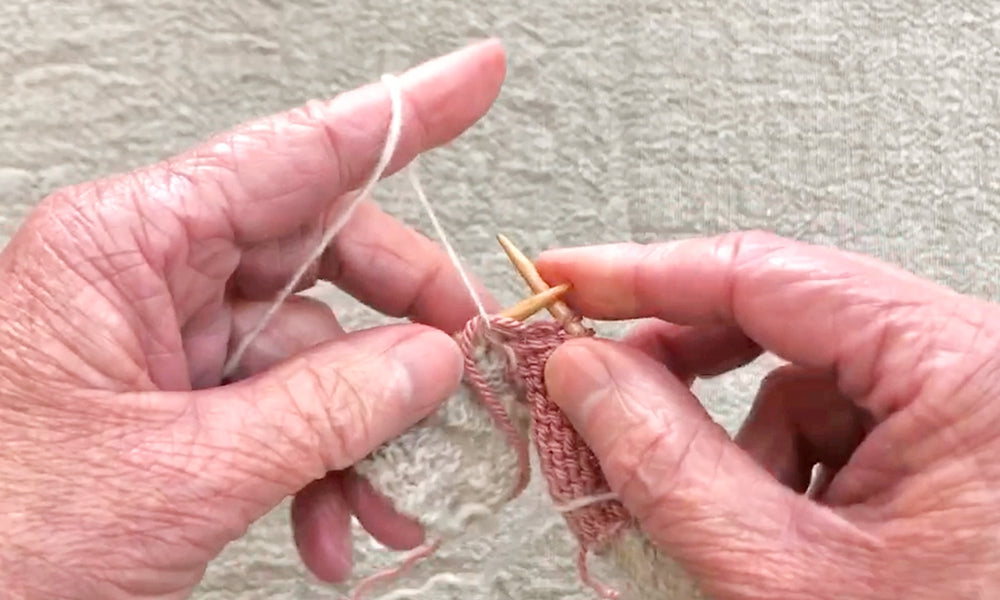
2
How-to Purlwise

A
Purl with your Main Color (MC) up to where your Contrasting Color (CC) begins.

B
Drop MC on top of the CC, and pick up CC in front of MC. (Both strands of yarn will be on the front side of your work.)

C
The MC will be "locked" behind CC.

D
Purl with CC up to the next color change.
E
Drop CC and pick up a new strand of MC from under and in front of CC.

F
Purl with MC. Repeat these steps for each color change.
3
Managing Yarn

A
Depending on your pattern, you may have different strands of multiple colors of yarn all live across the same row at the same time.

B
Rather than have several balls of yarn attached to your project, determine approximately how much yarn you need for each color section and pre-measure that amount of yarn.
For example, Julie determined she needed about 2.5 yards (2.25 meters) of yarn for each square in her Nine Patch.

C
Once you know how much yarn you need for a particular area of color (a patch in this case), measure your yarn with a Tape Measure and snip off just what you need, being sure to leave enough for tails.
Tip: Julie's favorite way to measure yarn quickly is by her own arm lengths. To do this, hold the end of the Tape Measure to the tip of your nose, then extend your other arm out, holding the tape measure. Make a note of your arm length. For Julie, her nose-to-hand measurement is 29 inches. So to get 2.5 yards (90 inches) of yarn for her Nine Patch squares, she holds the yarn to the tip of her nose and stretches her arm out (just like she did with the Tape Measure) three times to get approximately 90 inches. It doesn't have to be exact!

D
Now with shorter strands, you can simply let your yarn hang loosely behind your work.

E
If they seem to get a little tangled together, simply grab the tangle of yarn in one hand and pull out the individual strand with your other hand. Since it is not attached to a ball or cake, it will easily slide out.
Tip
If you don't want to bother with measuring out your yarn this way, or don't like the idea of letting your yarn hang loosely behind your work, you can instead organize your yarn balls with one or two Natural Mesh Bags. One bag can hold 2-3 small balls of yarn, and you can separate each strand with the snaps at the opening.
Patterns that Use Intarsia

1
Nine Patch
Intarsia is used to create the colorful patches in the NINE PATCH cardigan. Nine Patch is really two patterns in one: you get to choose whether you knit it with sleeves or as a vest - instructions for both are included. This pattern uses a modified Cocoknits Method with English tailored shoulders, but the worksheet is not required.

2
Molly
Intarsia is used to create the contrasting elbow patches in Molly (Version B). The Molly pullover (included in the COCOKNITS SWEATER WORKSHOP) is a sophisticated take on a basic sweatshirt, with Cocoknits Method shoulder construction and a rounded neckline achieved through short-row shaping.

3
Toni
Intarsia is used to create the patch pockets on Version A of the TONI Cardigan. Toni is a Cocoknits Method V-neck cardigan with plenty of customization options: two types of incorporated button bands, two types of color blocking, two types of pockets, two different lengths, and optional short-row bust darts.

4
Ally
Intarsia is used to seamlessly create the color-blocked sleeves in Ally. The distinct lines of this Cocoknits Method pattern were inspired by moto jackets. It also features articulated elbows, which are worked with short-row shaping.

Comments
Thank you! :)
Super helpful, as always!
Leave a Comment