How to Seam an Underarm (with No Gaps!)
The only seaming needed for most Cocoknits Method patterns is at the underarms. Julie loves to use false grafting, a technique for neatly joining horizontal edges, but there are a few extra steps when using it for underarm gaps. In this tutorial, Julie shows you her tricks to getting it just right - including what to do when the body and sleeve edges have a different number of stitches.
Recommended Tools

1
Claw Clips
Hold seam edges closed (both before and during seaming) to keep the knitting from stretching out.

2
Tapestry Needle
The bent tip easily slides between and through stitches, and the nickel-plated steel will stick to the magnet of a Maker's Keep.

How To...
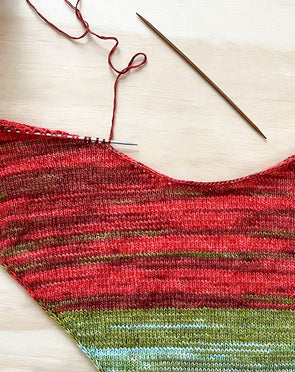
Note: Julie is right handed, so is seaming from right to left. In this demonstration the body edge is on the top, and the sleeve edge is on the bottom. Julie likes to leave an extra long tail to use for seaming, but you can use a new length of yarn if you prefer.

1
Optional: Use Claw Clips
Using Claw Clips to hold seam edges together can prevent the underarm gap from getting too stretched out, and can be used to keep your stitches aligned.
2
Neaten Up the Side

A
Before you start seaming, neaten up the outer edge of the underarm - this will ensure there are no gaps when you're finished!
Thread your yarn through a Tapestry Needle. Identify the stitch perpendicular to and on the side of the underarm opening.
Run your tapestry needle through both "legs" of this stitch from the bottom and pull yarn through to tighten it up.

B
Further neaten up the edge by tightening the loose stitch directly above the one you just worked. This will be the stitch column just to the right of the cast-on stitch.
Insert your tapestry needle behind both legs of this stitch from the right, under the V of the stitch. Pull the yarn through to tighten it up.
3
Begin False Grafting
The underarm opening is created by casting on stitches for both the sleeve and the body. If you cast on the same number of stitches, follow these steps to false graft the edges together (you can also see this in our previous false grafting tutorial).

A
Insert your Tapestry Needle through both legs of the first stitch of the bottom edge, behind the point of the V (it will appear upside-down). Pull the yarn through.

B
Insert your Tapestry Needle through both legs of the first stitch of the top edge, behind the point of the V. Pull the yarn through.

C
Repeat these two steps, threading your yarn behind the point of each V, until you've reached the end.
Skip to Step 5.
4
If Edges Have a Different Number of Stitches...
(Skip to Step 5 if you have the same number of stitches on each edge.)
There are some instances where you may have cast on a different number of stitches for either the body or sleeve at the underarm. If you have cast on more stitches for either side, you can still achieve a tidy false graft seam.
In this example, Julie has two extra stitches on the body (the top edge). Here's how to work the seam if you also cast on fewer sleeve stitches:

A
One way to "add" an extra stitch to one edge is to do this at the very beginning of false grafting (after neatening up the side):
For the very first false graft stitch on the sleeve edge, go backwards one and insert the tapestry needle behind the V before the cast-on stitch.
If you prefer, you can skip this step and instead work the technique shown in Step C below.

B
Insert your Tapestry Needle through both legs of the first stitch of the body edge, behind the point of the V. Pull the yarn through. Continue with false grafting.

C
You can also even out the stitch count by working a half stitch two times on the sleeve edge. To do this, insert your tapestry needle behind the first leg of the V and pull through.

D
Work a stitch on the body edge as normal, by threading the Tapestry Needle behind both legs of the V.

E
Thread your Tapestry Needle through the other leg of the same stitch you previously worked on the sleeve edge.
Repeat these steps as many times as necessary to even out the stitch count.
5
Neaten Up the Other Side

A
Once you've false grafted all the stitches on your sleeve and body edges, you'll have to neaten up the gap at the side just like you did at the beginning.

B
Run your tapestry needle behind both horizontal "legs" of the stretched out side bar, this time from the top. Pull yarn through to tighten it up.

C
Tighten up any other loose stitches like you did previously, by running your Tapestry Needle behind the point of the V.

6
All Done!
Pull your yarn tail to the wrong side of your work and weave in as you prefer (we like duplicate stitch). And you're finished! A neat and strong seam on your underarm, with no gaps.
Leave a Comment